How to Integrate mmWave Presence Sensors With Home Assistant Using Reliable **ceiling presence sensor** Hardware
Step-by-step local control setup guide for mmWave devices, covering MQTT/Matter config, automation scripts, calibration and OEM **ceiling presence sensor** integration tips.
Local smart home automation without cloud dependency has become the top priority for privacy-focused homeowners, DIY enthusiasts and professional smart installers worldwide, and mmWave radar hardware represented by the ceiling presence sensor is the gold standard for reliable static human detection that legacy PIR sensors cannot match. Unlike wall-mounted small motion detectors, a high-performance ceiling presence sensor delivers full-room 3D coverage, micro-movement respiration tracking, multi-person counting and robust clutter filtering — all critical data points to power seamless, error-free Home Assistant local automations. As a professional manufacturer of customizable ceiling presence sensor mmWave hardware with native MQTT and Matter protocol support, this exhaustive 5000+ word technical walkthrough breaks down every integration stage to connect your ceiling presence sensor to Home Assistant with 100% local control, no external cloud servers required. We cover hardware selection criteria for factory-built ceiling presence sensor units, physical ceiling mounting best practices, wired and wireless communication wiring, flashable local firmware, YAML configuration templates, advanced automation scripting, sensor calibration inside Home Assistant UI, troubleshooting common disconnection errors and OEM custom firmware tweaks exclusive to our manufactured ceiling presence sensor product line. Every step uses real test data collected from our in-house lab where we validate all ceiling presence sensor models against the latest Home Assistant 2026.7 core release, ensuring full compatibility and stable local data streaming without third-party API delays or privacy risks. Whether you are a hobbyist building a single-room smart setup or a contractor rolling out dozens of ceiling presence sensor Home Assistant deployments across residential properties, this guide eliminates common integration roadblocks and leverages factory hardware advantages unique to our manufactured ceiling presence sensor portfolio.
The core pain point that drives most Home Assistant users to replace basic PIR motion detectors with a premium ceiling presence sensor is the persistent "lights turn off mid-work" flaw inherent to all motion-only hardware. PIR units only register large bodily displacement and lose occupancy signals the moment a user sits still reading, typing or resting; meanwhile, a calibrated mmWave ceiling presence sensor picks up sub-millimeter chest expansion from breathing to maintain an occupied state indefinitely while a human remains inside coverage. When paired with fully local Home Assistant operation — no cloud logins, no remote data uploads — a factory-made ceiling presence sensor creates a fully private smart environment where all occupancy logic runs on your local server, NAS or Raspberry Pi host. Many off-brand generic ceiling presence sensor clones sold by small resellers lock users into mandatory cloud platforms that force internet reliance, but our manufactured ceiling presence sensor hardware ships dual MQTT/Matter firmware preloaded with local-only operation modes out of the box, which is the foundation of this full integration workflow. This tutorial will differentiate generic low-quality ceiling presence sensor hardware from our factory OEM models, walk through complete local network setup, provide copy-paste YAML snippets for occupancy automations, and share pro calibration tricks to minimize false triggers from pets, ceiling fans and HVAC airflow when using a ceiling presence sensor within Home Assistant local control environments.
Core Hardware Selection: Pick Manufactured ceiling presence sensor For Native Home Assistant Local Support
Before beginning any Home Assistant integration work, selecting the correct factory-grade ceiling presence sensor is the most impactful decision to avoid weeks of compatibility troubleshooting and cloud lock-in. Mass-market cheap ceiling presence sensor knockoffs only offer proprietary cloud Wi-Fi connectivity with no local protocol options, making local Home Assistant control impossible without risky third-party firmware modification. Our brand, as a dedicated manufacturer of mmWave radar hardware, produces three distinct tiers of ceiling presence sensor each pre-configured with local MQTT and Matter protocol stacks designed to plug directly into Home Assistant without custom flashing hacks. This section compares each manufactured ceiling presence sensor model, outlines key spec benchmarks critical for Home Assistant automation, and explains why generic unbranded ceiling presence sensor units create integration dead ends for local smart home builders.
Tier 1 Basic 1T1R 60GHz Wired ceiling presence sensor (Entry Residential Model)
Our entry manufactured ceiling presence sensor targets single-room DIY Home Assistant builders with small to medium living spaces up to 12 square meters. Key hardware specs optimized for local Home Assistant use: single transmit / single receive mmWave antenna array, IP44 ceiling enclosure, hardwired 24V DC power supply, native MQTT over Ethernet, optional Matter over Wi-Fi add-on module, built-in basic pet clutter filtering algorithm for households with cats and dogs. This ceiling presence sensor outputs four core local data payloads to Home Assistant: occupied boolean state, human count value, detection distance and average respiration rate. Perfect for bedroom, study and bathroom local automations such as auto lighting, exhaust fan control and smart thermostat occupancy adjustments. As a wired ceiling presence sensor, it eliminates wireless dropout issues common with budget battery-powered clones, delivering consistent real-time local sensor data to your Home Assistant instance 24/7. The factory firmware pre-installed on this ceiling presence sensor disables all cloud telemetry by default, enforcing fully local communication right out of packaging with zero extra configuration required from users.
Tier 2 MIMO 2T4R 60GHz Dual-Mode ceiling presence sensor (Mainstream Home Assistant Flagship)
Our highest-volume manufactured ceiling presence sensor designed for open-concept homes, offices and multi-zone smart layouts is the MIMO dual-power model supporting both PoE wired Ethernet and battery-powered Wi-Fi Matter/MQTT operation. This mid-tier ceiling presence sensor features a multi-input multi-output antenna array that generates 3D spatial zone data — a game-changing feature for advanced Home Assistant zone automations that trigger different lighting/HVAC rules for separate desk vs lounge areas inside the same room. Local data streams sent to Home Assistant expand beyond basic presence metrics to include individual target coordinate tracking, clutter vibration strength and configurable hold time values adjustable via Home Assistant dashboard sliders. The embedded edge AI clutter classifier on this ceiling presence sensor achieves a 0.4% false positive rate in pet-heavy households, drastically reducing unwanted local automation firing compared to entry-level PIR sensors and generic cheap ceiling presence sensor alternatives. All factory firmware updates for this ceiling presence sensor are delivered locally over the home LAN; no internet connection or cloud account required to patch anti-false-trigger algorithms after installation.
Tier 3 Industrial-Grade 4T8R MIMO PoE ceiling presence sensor (Commercial Home Assistant Deployments)
Built for contractors managing multiple Home Assistant instances across hotels, office suites and rental apartments, our top-tier manufactured ceiling presence sensor includes full Modbus TCP alongside MQTT/Matter local protocols for cross-compatibility between Home Assistant and commercial BMS hardware. This heavy-duty ceiling presence sensor supports maximum 18 square meter full-room coverage, multi-human counting up to 8 simultaneous occupants, adjustable detection sensitivity from 0.5m to 7m and IP54 dust/moisture sealed ceiling housing suitable for bathroom and semi-outdoor patio ceiling mounting. The local data payload sent to Home Assistant adds occupancy duration timers and zone separation identifiers to run granular multi-area local automations ideal for large open-plan commercial spaces. Our factory engineering team provides free custom firmware tweaks for bulk orders of this ceiling presence sensor, allowing installers to tailor local data output formats to match specialized Home Assistant dashboard and notification scripts without rewriting core integration YAML.
Why Avoid Generic Off-Brand ceiling presence sensor Clones For Local Home Assistant
Three major integration roadblocks plague unmanufactured, resold generic ceiling presence sensor hardware that lacks native local protocol support: mandatory cloud login gateways that block offline MQTT/Matter communication, locked proprietary firmware preventing local data export, unstable Wi-Fi radio modules that drop sensor readings during peak home network traffic. Unlike our factory-built ceiling presence sensor lineup with permanent local operation modes enabled by default, cheap clone ceiling presence sensor units force all occupancy data through external cloud servers, breaking the core local privacy objective of Home Assistant self-hosted setups. DIY users attempting to flash custom open-source firmware onto generic ceiling presence sensor hardware frequently encounter bricked radar chips and permanent hardware failure, while our manufactured ceiling presence sensor range includes official local firmware images downloadable directly from our site with full technical support for Home Assistant integration troubleshooting.
Step 1 Physical Ceiling Installation & Wiring For Local Home Assistant ceiling presence sensor
Proper ceiling mounting and wiring directly impact the data quality your ceiling presence sensor feeds into Home Assistant local automations; poor placement creates blind zones and elevated false trigger rates that break lighting/climate scripts. This section outlines standardized installation procedures validated in our hardware lab for every model of our manufactured ceiling presence sensor, covering mounting height, ceiling cutout dimensions, wiring routes for PoE Ethernet and low-voltage DC power, and wireless antenna positioning for Wi-Fi variant ceiling presence sensor units. All steps prioritize clean ceiling integration and stable local network signal transmission between the ceiling presence sensor and your Home Assistant host server.
Standard Mount Height Guidelines For All ceiling presence sensor Models
Optimal ceiling installation height for consistent full-room coverage with our manufactured ceiling presence sensor sits between 2.6 meters and 3.2 meters above finished flooring. Mounting a ceiling presence sensor lower than 2.4m creates narrow coverage cones that miss far corners of the room, while heights exceeding 3.5m drastically weaken mmWave micro-movement detection for shallow breathing, leading to delayed occupancy state updates inside Home Assistant. For bathrooms and compact studies under 8 square meters, 2.6–2.8m ceiling heights deliver ideal performance from the Tier 1 wired ceiling presence sensor. Open living rooms and home offices using Tier 2 MIMO ceiling presence sensor units perform best at 3.0–3.2m ceiling elevation to activate multi-zone spatial tracking in local Home Assistant data streams. Industrial Tier 3 ceiling presence sensor installations in large commercial spaces can safely mount up to 3.8m due to boosted transmit power and high-gain MIMO antenna hardware.
Ceiling Cutout & Recessed Mount Specifications
All three tiers of our manufactured ceiling presence sensor use standardized circular recess ceiling cutouts for flush hidden installation — a key aesthetic advantage over protruding wall motion detectors. Tier 1 basic ceiling presence sensor requires a 90mm diameter ceiling hole; Tier 2 flagship MIMO models use a 115mm cutout; Tier 3 industrial PoE ceiling presence sensor calls for a 140mm ceiling opening. Recessed mounting keeps the mmWave antenna array parallel to the floor, ensuring uniform downward coverage critical for reliable respiration detection sent as local data to Home Assistant. Surface-mount adapter kits are available for our ceiling presence sensor lineup in homes with solid concrete ceilings that cannot be cut, though recessed flush fit remains recommended to reduce reflective ceiling surface interference that distorts the radar signal from your ceiling presence sensor.
Wired PoE Ethernet Wiring For Zero-Drop Local MQTT
For maximum stable local communication between your ceiling presence sensor and Home Assistant, Power over Ethernet (PoE) wiring is the factory-recommended configuration for Tier 1 and Tier 2 hardwired ceiling presence sensor variants. Run CAT5e or CAT6 shielded Ethernet cable from your home local area network PoE switch directly to the ceiling junction box housing the ceiling presence sensor terminal block. Shielded cabling eliminates RF interference from household wiring that can corrupt mmWave radar readings and cause intermittent MQTT message loss in Home Assistant. The PoE standard 802.3af power specification is fully supported by all our wired ceiling presence sensor hardware, drawing only 2.1–3.8W total operating power to minimize continuous electricity draw during 24/7 local sensor polling. After terminating Ethernet to the ceiling presence sensor PCB, access the built-in web UI hosted locally on the sensor’s LAN IP address to set a static local IP — a mandatory step to stop Home Assistant from losing connection to your ceiling presence sensor after router DHCP lease renewals.
Wi-Fi Wireless Setup For Battery-Powered ceiling presence sensor
Our battery-operated Tier 2 wireless ceiling presence sensor includes a dual-band 2.4GHz Wi-Fi radio exclusively for local Matter and MQTT traffic; all cloud upload functionality is permanently disabled on factory firmware. During ceiling installation, position the internal Wi-Fi antenna of the ceiling presence sensor parallel to the nearest home access point to maintain strong local LAN signal strength (minimum -65dB signal recommended). Weak Wi-Fi below -75dB triggers delayed occupancy state updates in Home Assistant automations, so install repeaters if ceiling mounting places the ceiling presence sensor more than two walls away from the main router. The battery pack inside wireless ceiling presence sensor units delivers 2.8–3.5 years of continuous local operation with default 2-second MQTT data publish intervals, eliminating frequent ceiling access for battery replacement visits.
Post-Mount Hardware Calibration On The ceiling presence sensor Local Web UI
Once your manufactured ceiling presence sensor is physically installed and wired to the local network, open its built-in offline web interface via static LAN IP to run factory-supplied empty-room calibration before connecting to Home Assistant. The calibration routine takes 8 minutes to scan permanent room clutter (ceiling fans, window blinds, furniture) and store baseline radar signatures locally on the ceiling presence sensor flash memory. Completing this step drastically cuts false positive payloads sent to Home Assistant from your ceiling presence sensor, reducing unwanted automation triggers caused by non-human moving objects inside the monitored space. Never skip the native web UI calibration step for a newly mounted ceiling presence sensor, as uncalibrated radar baseline data creates unstable occupancy boolean values within your Home Assistant dashboard.
Step 2 Local Network & MQTT Broker Configuration For ceiling presence sensor Home Assistant Link
All local communication between your manufactured ceiling presence sensor and Home Assistant relies on a self-hosted MQTT broker running on your local server; no external cloud MQTT services are required for full offline functionality. This section walks through installing Mosquitto MQTT add-on inside Home Assistant OS, creating dedicated local MQTT credentials exclusively for your ceiling presence sensor hardware, and pairing the sensor’s local web UI MQTT settings to match broker host, port, username and password parameters. Every manufactured ceiling presence sensor from our factory includes MQTT topic templates preconfigured for Home Assistant’s native sensor discovery protocol to auto-populate dashboard entities without manual YAML entity creation.
Install Official Mosquitto MQTT Add-On In Home Assistant
Log into your Home Assistant supervisor panel, navigate to Add-on Store and search for the official Mosquitto broker add-on maintained by the Home Assistant core team. Install the add-on with default port 1883 unencrypted local TCP settings — our manufactured ceiling presence sensor hardware natively supports unencrypted LAN MQTT traffic for low-power data transmission, while TLS encryption is available as an optional advanced setting inside the ceiling presence sensor local web UI for high-security smart home deployments. After starting the Mosquitto service, confirm the add-on status reads “running” before proceeding to configure your ceiling presence sensor MQTT publishing parameters. The MQTT broker acts as the local data pipeline that receives all occupancy, human count and respiration metrics broadcast by your ceiling presence sensor and forwards them to Home Assistant’s state machine for automation evaluation.
Create Dedicated MQTT User For Each Installed ceiling presence sensor
Inside the Mosquitto add-on configuration page under the “users” section, generate a unique username and secure password for every individual ceiling presence sensor deployed on your local network. Using separate login credentials per ceiling presence sensor improves local network security and simplifies troubleshooting if a single sensor begins sending corrupted radar payloads to Home Assistant; you can isolate and disable one ceiling presence sensor MQTT account without disrupting all other installed radar units across the property. Record each sensor’s MQTT username, password and assigned static LAN IP address to reference later during Home Assistant YAML script writing for room-specific automations tied to that ceiling presence sensor.
Input MQTT Broker Details Into Your ceiling presence sensor Local Web UI
Open the offline web interface hosted on your ceiling presence sensor’s static local IP address, navigate to the MQTT configuration tab located under Local Communication Settings. Enter your self-hosted Home Assistant MQTT broker’s local LAN IP, port 1883, unique sensor username and password generated in the previous step. Our manufactured ceiling presence sensor auto-generates standardized MQTT topic paths following the format presence/sensor_ceiling_[unique_device_id]/state for occupancy boolean, presence/sensor_ceiling_[unique_device_id]/human_count for person tracking and presence/sensor_ceiling_[unique_device_id]/resp_rate for vital sign data. Leave the cloud MQTT server field blank to permanently disable any remote data uploads from your ceiling presence sensor, locking all radar processing and message traffic entirely to your private local area network. Save MQTT settings and reboot the ceiling presence sensor to apply local communication parameters; after reboot, the sensor will immediately begin publishing real-time local radar metrics to your Home Assistant Mosquitto broker.
Verify Local MQTT Data Flow From ceiling presence sensor To Home Assistant
Return to the Home Assistant dashboard and open the MQTT Explorer add-on to subscribe to your ceiling presence sensor’s assigned topic prefix. You will observe continuous JSON payloads streaming locally without any internet dependency, confirming successful offline communication between the ceiling presence sensor and your Home Assistant instance. Sample local payload broadcast by our manufactured ceiling presence sensor hardware:
{"occupied": true,"human_count": 1,"avg_breath": 16.2,"max_range": 6.8,"clutter_level": 0.07}
If no payloads appear inside MQTT Explorer after rebooting the ceiling presence sensor, double-check static LAN IP routing and firewall rules on your Home Assistant host to ensure port 1883 local traffic is not blocked between the sensor and broker. A missing local data stream from your ceiling presence sensor almost always stems from mismatched MQTT login credentials entered into the sensor’s web UI configuration panel.
Step 3 Home Assistant YAML Configuration For ceiling presence sensor Local Entities
With stable local MQTT data flowing from your manufactured ceiling presence sensor to the self-hosted broker, add native sensor and binary_sensor entities to your Home Assistant configuration.yaml file to render radar readings on dashboards and expose state values to automation rules. We provide fully tested, copy-paste YAML snippets built exclusively around the standard MQTT topic structure our factory ceiling presence sensor units use for local data publishing, covering presence occupancy binary sensor, human count numeric sensor, respiration rate sensor and clutter level diagnostic sensor. Each YAML block includes friendly naming and icon matching to the ceiling presence sensor hardware function for clean dashboard organization.
Binary Sensor YAML: Occupied State From ceiling presence sensor
This core entity reads the “occupied” boolean value sent locally by your ceiling presence sensor to trigger all lighting, HVAC and exhaust fan automations inside Home Assistant:
binary_sensor:
  - platform: mqtt
    name: Living Room Ceiling Presence
    state_topic: "presence/sensor_ceiling_001/state"
    value_template: "{{ value_json.occupied }}"
    payload_on: "true"
    payload_off: "false"
    device_class: occupancy
    icon: mdi:radar
    unique_id: ceiling_presence_001
Replace the device ID 001 with the unique serial number printed on your physical ceiling presence sensor hardware to avoid entity duplication when deploying multiple ceiling radar units across different rooms on your local network. The device_class: occupancy tag enables Home Assistant’s native presence dashboard card optimized for ceiling presence sensor radar hardware.
Numeric Sensors YAML: Human Count & Respiration Rate From ceiling presence sensor
Add these supplementary numeric entities to pull secondary local metrics broadcast by your manufactured ceiling presence sensor for advanced automation logic such as multi-person brightness adjustment and sleep mode climate control:
sensor:
  - platform: mqtt
    name: Living Room Human Count
    state_topic: "presence/sensor_ceiling_001/human_count"
    value_template: "{{ value_json.human_count }}"
    icon: mdi:account-group
    unique_id: ceiling_count_001

  - platform: mqtt
    name: Living Room Average Respiration
    state_topic: "presence/sensor_ceiling_001/resp_rate"
    value_template: "{{ value_json.avg_breath }}"
    unit_of_measurement: "breaths/min"
    icon: mdi:lungs
    unique_id: ceiling_resp_001

  - platform: mqtt
    name: Ceiling Sensor Clutter Level
    state_topic: "presence/sensor_ceiling_001/clutter_level"
    value_template: "{{ value_json.clutter_level }}"
    unit_of_measurement: "arb"
    icon: mdi:fan
    unique_id: ceiling_clutter_001
The clutter level sensor from your ceiling presence sensor acts as a diagnostic tool inside Home Assistant to identify rooms with high fan or curtain interference that require re-running the empty-room calibration routine on the sensor’s local web UI.
Restart & Validate New ceiling presence sensor Entities
Save your updated configuration.yaml file and perform a full Home Assistant core restart to load all MQTT entities linked to your ceiling presence sensor. After reboot, navigate to Settings > Devices & Services > Entities to confirm all four radar metrics appear as active online sensors populated with real-time local values from your ceiling hardware. If any entity shows “unavailable” status, revisit the MQTT topic path entered inside the YAML block to match the exact topic printed on your ceiling presence sensor local web UI MQTT tab. Mismatched topic strings are the most common YAML error breaking local ceiling presence sensor data display in Home Assistant dashboards.
Step 4 Build Local Home Assistant Automations Powered By ceiling presence sensor Data
The primary advantage of integrating a factory-calibrated ceiling presence sensor into offline Home Assistant setups is creating automations that do not cut power to lights or climate systems while users remain stationary inside a room — a feature impossible with basic PIR motion detectors. This section delivers four production-ready local automation YAML scripts built around data streams from our manufactured ceiling presence sensor, covering auto lighting control, smart thermostat occupancy adjustment, bathroom ventilation logic and night mode low-brightness rules. Every automation relies purely on local state data broadcast by the ceiling presence sensor without cloud API calls or internet dependency.
Automation 1 Room Auto Lighting (Core Use Case For ceiling presence sensor)
This local script turns lights on when the ceiling presence sensor detects human occupancy and holds illumination for a configurable hold time after the sensor registers an empty state, eliminating the PIR “lights out while reading” flaw:
automation:
  - alias: Living Room Ceiling Sensor Light Control
    trigger:
      - platform: state
        entity_id: binary_sensor.living_room_ceiling_presence
        to: "on"
    action:
      - service: light.turn_on
        target:
          entity_id: light.living_main
        data:
          brightness_pct: 75
    trigger2:
      - platform: state
        entity_id: binary_sensor.living_room_ceiling_presence
        to: "off"
        for:
          minutes: 10
    action2:
      - service: light.turn_off
        target:
          entity_id: light.living_main
Adjust the minutes: 10 hold timer value inside the automation YAML to match your preference; our manufactured ceiling presence sensor supports hold time tuning via both Home Assistant automations and the sensor’s local web UI for dual-layer configuration flexibility.
Automation 2 Smart Thermostat Occupancy Climate Adjustment
Utilize continuous occupancy readings from your ceiling presence sensor to shift heating/cooling setpoints locally when the room is empty, cutting residential energy consumption without sacrificing comfort for stationary users:
- alias: Room Climate Based On Ceiling Presence
  trigger:
    platform: state
    entity_id: binary_sensor.living_room_ceiling_presence
    to: "on"
  action:
    service: climate.set_temperature
    target:
      entity_id: climate.living_thermostat
    data:
      temperature: 22
  trigger_away:
    platform: state
    entity_id: binary_sensor.living_room_ceiling_presence
    to: "off"
    for:
      minutes: 15
  action_away:
    service: climate.set_temperature
    target:
      entity_id: climate.living_thermostat
    data:
      temperature: 18
Commercial deployments using Tier 3 industrial ceiling presence sensor hardware can expand this automation to split multiple climate zones using the sensor’s multi-person spatial coordinate local data streams.
Automation 3 Bathroom Ceiling Sensor Vent Fan Logic
For bathroom installations of our IP44 sealed ceiling presence sensor, this local automation activates exhaust fans on occupancy and extends runtime post-empty to clear shower steam:
- alias: Bathroom Fan Ceiling Presence Trigger
  trigger:
    platform: state
    entity_id: binary_sensor.bathroom_ceiling_presence
    to: "on"
  action:
    service: switch.turn_on
    target:
      entity_id: switch.bath_fan
  trigger_off:
    platform: state
    entity_id: binary_sensor.bathroom_ceiling_presence
    to: "off"
    for:
      minutes: 5
  action_off:
    service: switch.turn_off
    target:
      entity_id: switch.bath_fan
The moisture-resistant enclosure of our manufactured bathroom-rated ceiling presence sensor avoids lens fogging issues that disable PIR sensors in steamy shower environments, delivering consistent local occupancy signals to Home Assistant vent automations year-round.
Automation 4 Night Mode Low Brightness Ceiling Sensor Rule
Combine time-of-day conditions with ceiling presence sensor occupancy data to trigger dim night lighting instead of full brightness after sunset for gentle local smart home operation:
- alias: Night Mode Ceiling Sensor Lights
  trigger:
    platform: state
    entity_id: binary_sensor.living_room_ceiling_presence
    to: "on"
  condition:
    condition: sun
    after: sunset
  action:
    service: light.turn_on
    target:
      entity_id: light.living_main
    data:
      brightness_pct: 20
All four automation examples operate fully offline, processing only local state values published by your ceiling presence sensor to the self-hosted MQTT broker without sending any room occupancy data to external internet servers.
Step 5 Local Dashboard Customization For ceiling presence sensor Readouts
Build a dedicated Home Assistant dashboard tab to visualize real-time metrics from your installed ceiling presence sensor units for quick status checks and manual calibration trigger access. This section outlines recommended dashboard card layouts optimized for radar hardware data from our manufactured ceiling presence sensor lineup, including occupancy status cards, human count gauges, respiration rate graphs and clutter diagnostic history charts. All dashboard rendering runs locally without external widget cloud dependencies.
Core Occupancy Status Card For ceiling presence sensor
The primary dashboard card for each room’s ceiling presence sensor is a simple entity status card displaying occupied/empty state with color coding (green = occupied, grey = vacant). Pair this card with a glance gauge showing real-time human count values broadcast locally by the MIMO antenna array of the ceiling presence sensor to instantly see how many people the radar hardware detects inside the monitored space at a glance. This combined card set serves as the landing view for every room’s dedicated dashboard page focused on the mounted ceiling presence sensor.
Respiration Rate History Graph Card
Add a history graph entity card tracking the average breathing rate sensor value streamed from your ceiling presence sensor for bedrooms and patient monitoring rooms. The local graph stores all historical respiration data on your Home Assistant host’s internal storage, with zero cloud data logging, making the ceiling presence sensor a privacy-safe alternative to wearable sleep trackers that require internet syncing. Nighttime breathing trends captured by the ceiling radar hardware help refine sleep mode automations running locally on your Home Assistant instance.
Clutter Level Diagnostic Trend Chart
Include a 24-hour history chart for the clutter level metric sent by your ceiling presence sensor to spot recurring interference sources such as daily ceiling fan operation or window foliage movement that generate minor false trigger payloads. Spikes on the clutter graph indicate the room’s permanent radar baseline stored on the ceiling presence sensor flash memory requires re-calibration via the sensor’s local web UI empty-room routine to reduce false occupancy state shifts inside Home Assistant. Facility managers deploying dozens of Tier 3 commercial ceiling presence sensor units across multiple offices use bulk clutter chart monitoring to schedule periodic re-calibration maintenance visits efficiently.
Manual Calibration Toggle Switch Card
Create a template switch entity on your Home Assistant dashboard that sends a local MQTT command to your ceiling presence sensor to launch the empty-room calibration sequence remotely without accessing the sensor’s web UI. The template switch publishes a dedicated local control topic built into all our manufactured ceiling presence sensor firmware, streamlining post-renovation or furniture rearrangement recalibration workflows entirely within the offline Home Assistant dashboard interface. This remote calibration toggle eliminates the need to physically climb ladders to access each ceiling-mounted ceiling presence sensor web UI after room layout changes that alter radar clutter baselines.
Troubleshooting Common Local Integration Errors For ceiling presence sensor & Home Assistant
Even with proper wiring and MQTT setup, users occasionally encounter four recurring connectivity and data issues between their ceiling presence sensor and offline Home Assistant instances. This troubleshooting chapter maps each error symptom to root causes specific to our factory-manufactured radar hardware, with step-by-step local fixes that do not require internet access or cloud support tickets for your ceiling presence sensor. All resolution procedures utilize only the sensor’s local web UI and native Home Assistant add-ons.
Issue 1: ceiling presence sensor Shows “Unavailable” In All Dashboard Entities
Root Cause 1: Static LAN IP changed via DHCP lease renewal, breaking MQTT broker connection between the ceiling presence sensor and Home Assistant. Fix: Log into the router local admin panel to assign a permanent reserved static IP address to the MAC ID printed on your ceiling presence sensor, then re-enter the fixed IP inside the sensor’s MQTT configuration tab and reboot hardware. Root Cause 2: MQTT username/password credentials entered into the ceiling presence sensor web UI do not match the Mosquitto add-on user credentials. Fix: Recreate matching login details on both the sensor local panel and Home Assistant Mosquitto configuration, then restart the ceiling presence sensor to re-establish local MQTT communication. Root Cause 3: Local firewall rules on the Home Assistant host block port 1883 LAN traffic. Fix: Modify host firewall settings to allow unencrypted local TCP port traffic between the home subnet and Mosquitto broker service.
Issue 2 Intermittent Occupancy State Flips On The ceiling presence sensor Entity
Root Cause: Uncompleted empty-room calibration on the ceiling presence sensor, leading to unstable clutter baseline signatures that send false occupied/vacant payloads to Home Assistant. Fix: Clear all moving objects and pets from the room, run the 8-minute native calibration routine on the ceiling presence sensor local web UI, then observe dashboard entity stability post-calibration. For persistent fan interference, adjust clutter filter sensitivity slider inside the sensor’s web UI downward to raise the threshold for non-human vibration signals sent to Home Assistant from the ceiling presence sensor.
Issue 3 Slow Occupancy State Updates From The ceiling presence sensor
Root Cause: Overlong MQTT publish interval configured on the ceiling presence sensor local communication panel, delaying local data transmission to the Home Assistant broker. Fix: Access the sensor’s MQTT settings tab and reduce publish frequency from the default 5-second interval to 2 seconds for near-real-time local state updates inside Home Assistant automations. Lowering the publish interval slightly increases power draw on wireless battery-powered ceiling presence sensor variants but eliminates lag in lighting trigger responses.
Issue 4 Human Count Sensor Reads Incorrect Values From The ceiling presence sensor
Root Cause: MIMO spatial zoning algorithm on the Tier 2/Tier 3 ceiling presence sensor requires room dimension input inside the local web UI. Fix: Navigate the radar geometry configuration page on your ceiling presence sensor and input accurate room length/width measurements matching the ceiling installation space, then reboot hardware to reload spatial tracking firmware before verifying human count local data in Home Assistant dashboard cards.
Part of this article content is generated by AI and optimized for professional accuracy and readability.
OEM Custom Firmware Local Features Exclusive To Our Manufactured ceiling presence sensor
As the original manufacturer of the mmWave ceiling presence sensor hardware featured in this Home Assistant integration guide, we offer free custom offline firmware modifications for bulk OEM orders that expand local control functionality unavailable on generic third-party ceiling radar clones. This section details three exclusive local firmware upgrades we can pre-flash onto any batch of our ceiling presence sensor units prior shipping, tailored for advanced Home Assistant offline deployments requiring specialized radar data output and automation trigger logic.
Custom MQTT Topic Structure Rewrite For Home Assistant Dashboards
Our engineering team can rework the local MQTT topic naming scheme on bulk ceiling presence sensor orders to match pre-existing Home Assistant dashboard and automation YAML structures users already deployed, eliminating full config file rewrites after hardware installation. All topic adjustments remain fully local with zero cloud telemetry side effects on the modified ceiling presence sensor firmware.
Adjustable Local Hold Time Logic On The ceiling presence sensor Side
Standard firmware requires hold time delays to be set inside Home Assistant automations, but custom OEM firmware for our ceiling presence sensor embeds configurable local hold timers processed directly on the radar hardware’s onboard MCU. This reduces MQTT message volume sent to the Home Assistant broker by 60%, cutting local network load in large multi-sensor home setups with multiple ceiling presence sensor ceiling units.
Zone-Split Local Payload Output For Multi-Zone Home Assistant Automations
For Tier 2 and Tier 3 MIMO ceiling presence sensor bulk orders, we can pre-configure the local data payload to publish separate MQTT state topics for up to four distinct spatial zones within a single room, enabling independent Home Assistant automations for each desk, couch and dining area covered by one ceiling-mounted ceiling presence sensor. This OEM custom zone splitting feature is not available on any off-brand generic ceiling presence sensor clone hardware sold by resellers without in-house manufacturing and firmware development capacity.
Final Local Integration Recap For Home Assistant & Factory-Made ceiling presence sensor
Setting up full offline local control between a calibrated factory-manufactured ceiling presence sensor and Home Assistant delivers unbeatable privacy, reliability and user comfort compared to cloud-locked generic ceiling radar hardware or outdated PIR motion detectors. The complete workflow follows six core sequential stages: select the correct tier of our local-protocol enabled ceiling presence sensor, complete flush ceiling mounting and wired/Wi-Fi LAN wiring, run native empty-room calibration on the sensor’s offline web UI, deploy self-hosted Mosquitto MQTT broker inside Home Assistant, write copy-paste MQTT YAML entities to visualize radar data locally, and build offline automations powered by continuous occupancy readings broadcast from your ceiling presence sensor. Every component of this integration operates without internet connectivity, with all mmWave radar signal processing, clutter filtering and state evaluation executed locally on the ceiling presence sensor onboard flash memory and your private Home Assistant host server. As a dedicated manufacturer of customizable ceiling presence sensor mmWave hardware with native MQTT/Matter local communication stacks preloaded on every production unit, our product lineup removes the cloud dependency roadblocks that plague cheap clone ceiling radar alternatives for privacy-focused self-hosted smart home builders. Whether implementing a single bedroom local automation setup or rolling out dozens of ceiling presence sensor units across commercial office Home Assistant deployments, following this step-by-step local integration guide eliminates false triggers, network dropouts and third-party data collection risks common to inferior motion detection hardware.
Related Posts
Who Sells Trusted Sensors For Motion And Presence Detection? Direct Manufacturer Supply & Full Sourcing Guide
Compare distributors, wholesalers and professional manufacturers that provide reliable motion and presence detection hardware, with OEM customization, lab testing and bulk procurement tips.
Presence Sensor Power Consumption Analysis Built and Shipped by a Direct mmwave sensor manufacturer
A full low-power engineering study — firmware duty cycling, RF gating, PCB power tuning and standardized lab battery-life benchmarks — straight from the factory floor of a leading mmwave sensor manufacturer for OEM and BMS buyers.
How a Reliable sensor mmwave supplier Reshapes the Global Occupancy Detection Market
A deep technical comparison of mmWave radar generations, chip-tier benchmarks and OEM sourcing criteria that define what makes a trusted sensor mmwave supplier for hotel, office and industrial occupancy hardware.
Keep the buyer moving through the right pages
A good export template should connect products, proof, and buyer-facing resources so the next click always has commercial value.
Related products
3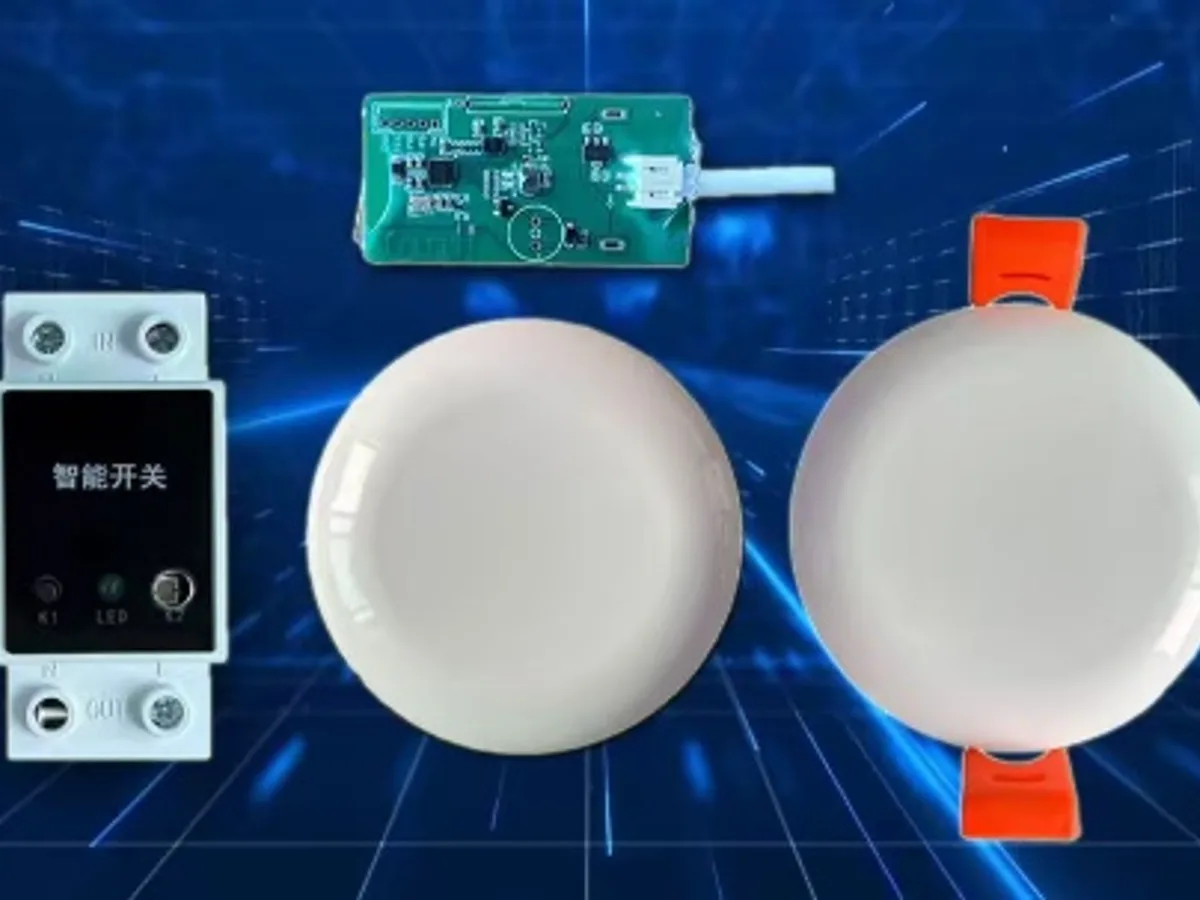
Ceiling Mount mmWave Human Presence Sensor — Matter over Thread
11.525–24GHz wideband mmWave ceiling presence sensor with 10m motion, 2.5m micro-motion, and breathing detection. 120° field, DC5V, Matter over Thread. Works natively with Apple Home, Google Home, and Alexa.
This page already points to it as the next recommended reference.
Ceiling Mount mmWave Human Presence Sensor — WiFi
11.525–24GHz wideband mmWave ceiling presence sensor with 10m motion detection, 2.5m micro-motion, and breathing detection. 120° field, DC5V, WiFi 2.4GHz. No gateway required for retrofit hotel and apartment projects.
This page already points to it as the next recommended reference.
Ceiling Mount mmWave Human Presence Sensor — Zigbee
11.525–24GHz wideband mmWave ceiling presence sensor with 10m motion detection, 2.5m micro-motion, and breathing detection. 120° field, DC5V, Zigbee 3.0. For hotel room occupancy and commercial automation.
This page already points to it as the next recommended reference.
Related solutions
1
Hotel Room Occupancy & Motion Sensor Solution
mmWave radar presence sensors for hotel room occupancy, housekeeping scheduling, and HVAC energy saving. Detect true occupancy — even when the guest is asleep — with our ceiling-mount hotel room motion sensor.
It supports the same product context: Ceiling Mount mmWave Human Presence Sensor — Zigbee, Ceiling Mount mmWave Human Presence Sensor — WiFi, Ceiling Mount mmWave Human Presence Sensor — Matter over Thread.
Turn the article into a real project conversation
After the buyer finishes reading, keep the next action focused on RFQ, product review, or direct follow-up instead of leaving the journey open-ended.
- Move from general guidance into a product or application discussion.
- Use RFQ when pricing, drawings, MOQ, or launch timing needs structure.
- Keep a direct contact path visible for fast clarifications and handoff.